
Dried Wedding Flower Keepsake: Creative Preservation Ideas
The day you say "I do" is filled with moments you'll want to keep forever, and among them are the floral arrangements. From the bouquet you hold walking down the aisle to the centerpieces that witness your first dinner as a married couple, each bloom is chosen with purpose and love. So, after all the effort that goes into selecting these decorations, it's natural to look for ways to save them.
This guide is dedicated to showing you how you can cherish your floral arrangements by sharing creative wedding flower keepsake ideas, ensuring every bloom and petal remains as vivid and meaningful as your memories.
How to Dry Your Wedding Flowers
If you've opted for fresh flowers for your wedding decor, before unleashing your creativity with them, you'll need to dry them first. Whether it's your bridal bouquet, centerpieces from your reception, or the boutonnières, drying them properly ensures that they retain their beauty for years to come.
Here's how to dry flowers:
- Choose the Right Time: The best time to start the drying process is immediately after your wedding. The fresher the flowers, the better they will look once dried.
-
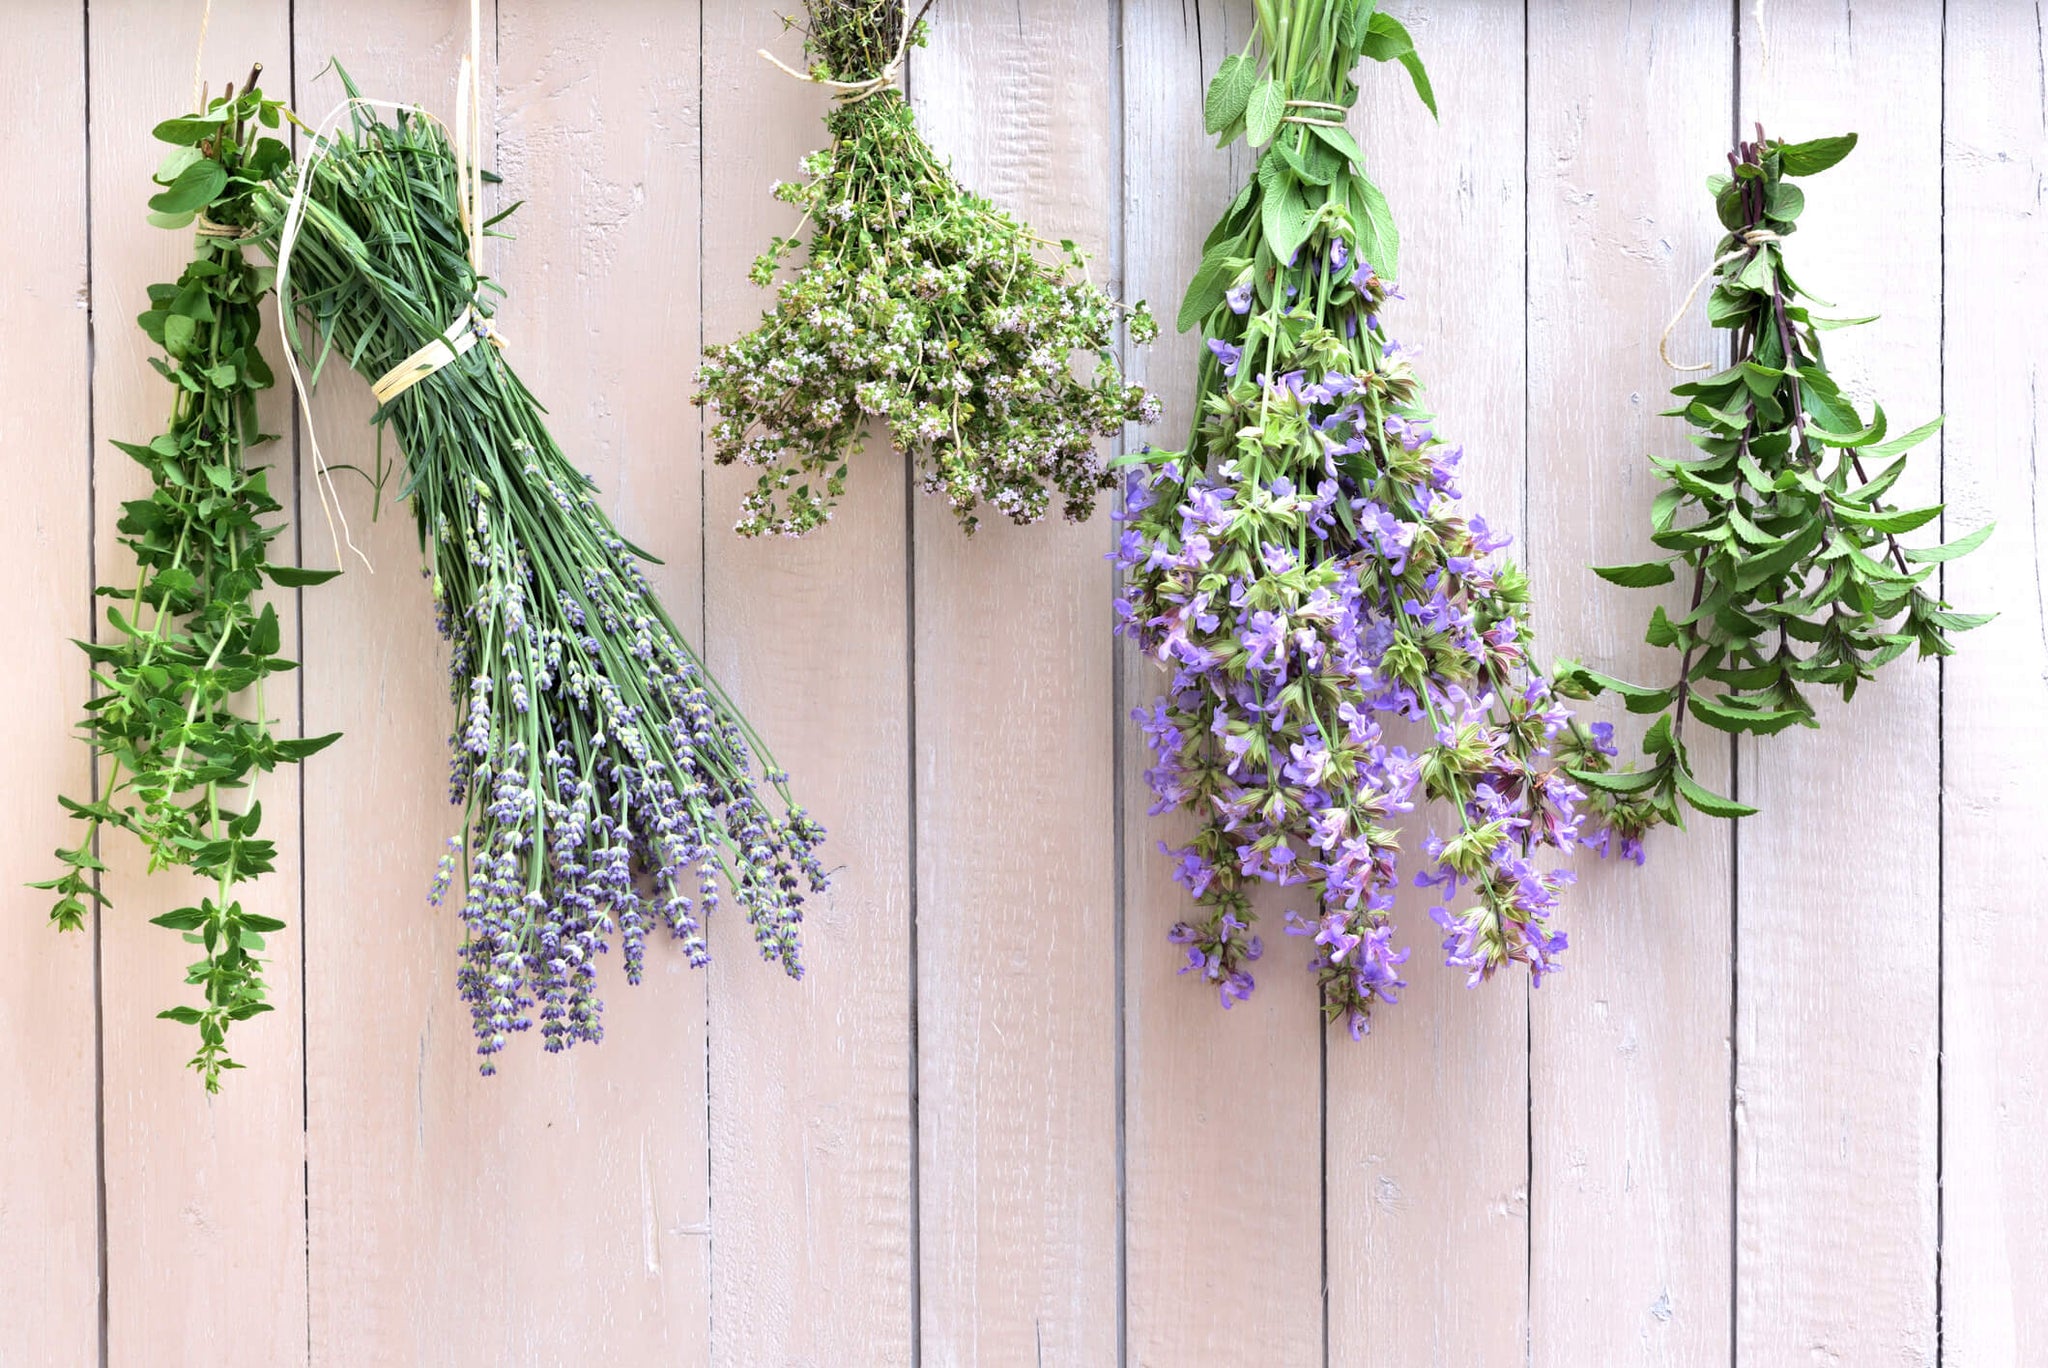
Select the Method: There are several methods for drying flowers, but two popular ones include air drying and using silica gel.
a. Air Drying: This traditional method involves tying the stems together and hanging them upside down in a warm, dry, and dark place. A closet or attic works well. Air circulation helps them to dry evenly, but avoid direct sunlight as it can fade the colors. This process typically takes two to four weeks.
a. Silica Gel: If you’re looking to preserve the shape and color of your flowers more accurately, silica gel is a great option. Place the blooms in a container and completely cover them with silica gel beads, which absorb moisture. This method can dry in a matter of days but requires checking periodically to ensure they don’t over-dry.
- Prepare Your Flowers: Before drying, remove any leaves you don’t want to keep, and trim the stems to your desired length. If you’re air drying, consider spraying the petals with hairspray or a floral preservative to help them hold their shape and color.
- Check Progress: Whether you're air drying or using silica gel, check in on them after a week to gauge their progress. Take note that some types may dry faster than others.
- Handling and Storage: Once fully dried, carefully remove your flowers from the drying setup. If they were hung, take them down gently to avoid dropping petals. For those that are silica gel-dried, brush off any remaining beads with a soft brush.
Creative Ideas for Your Dried Wedding Flowers Keepsake
After drying your floral arrangements, the next step is to transform them into wedding flower keepsakes that encapsulate the beauty and memories of your special day.
Here are seven creative ideas to inspire you:
1. Framed Flower Art
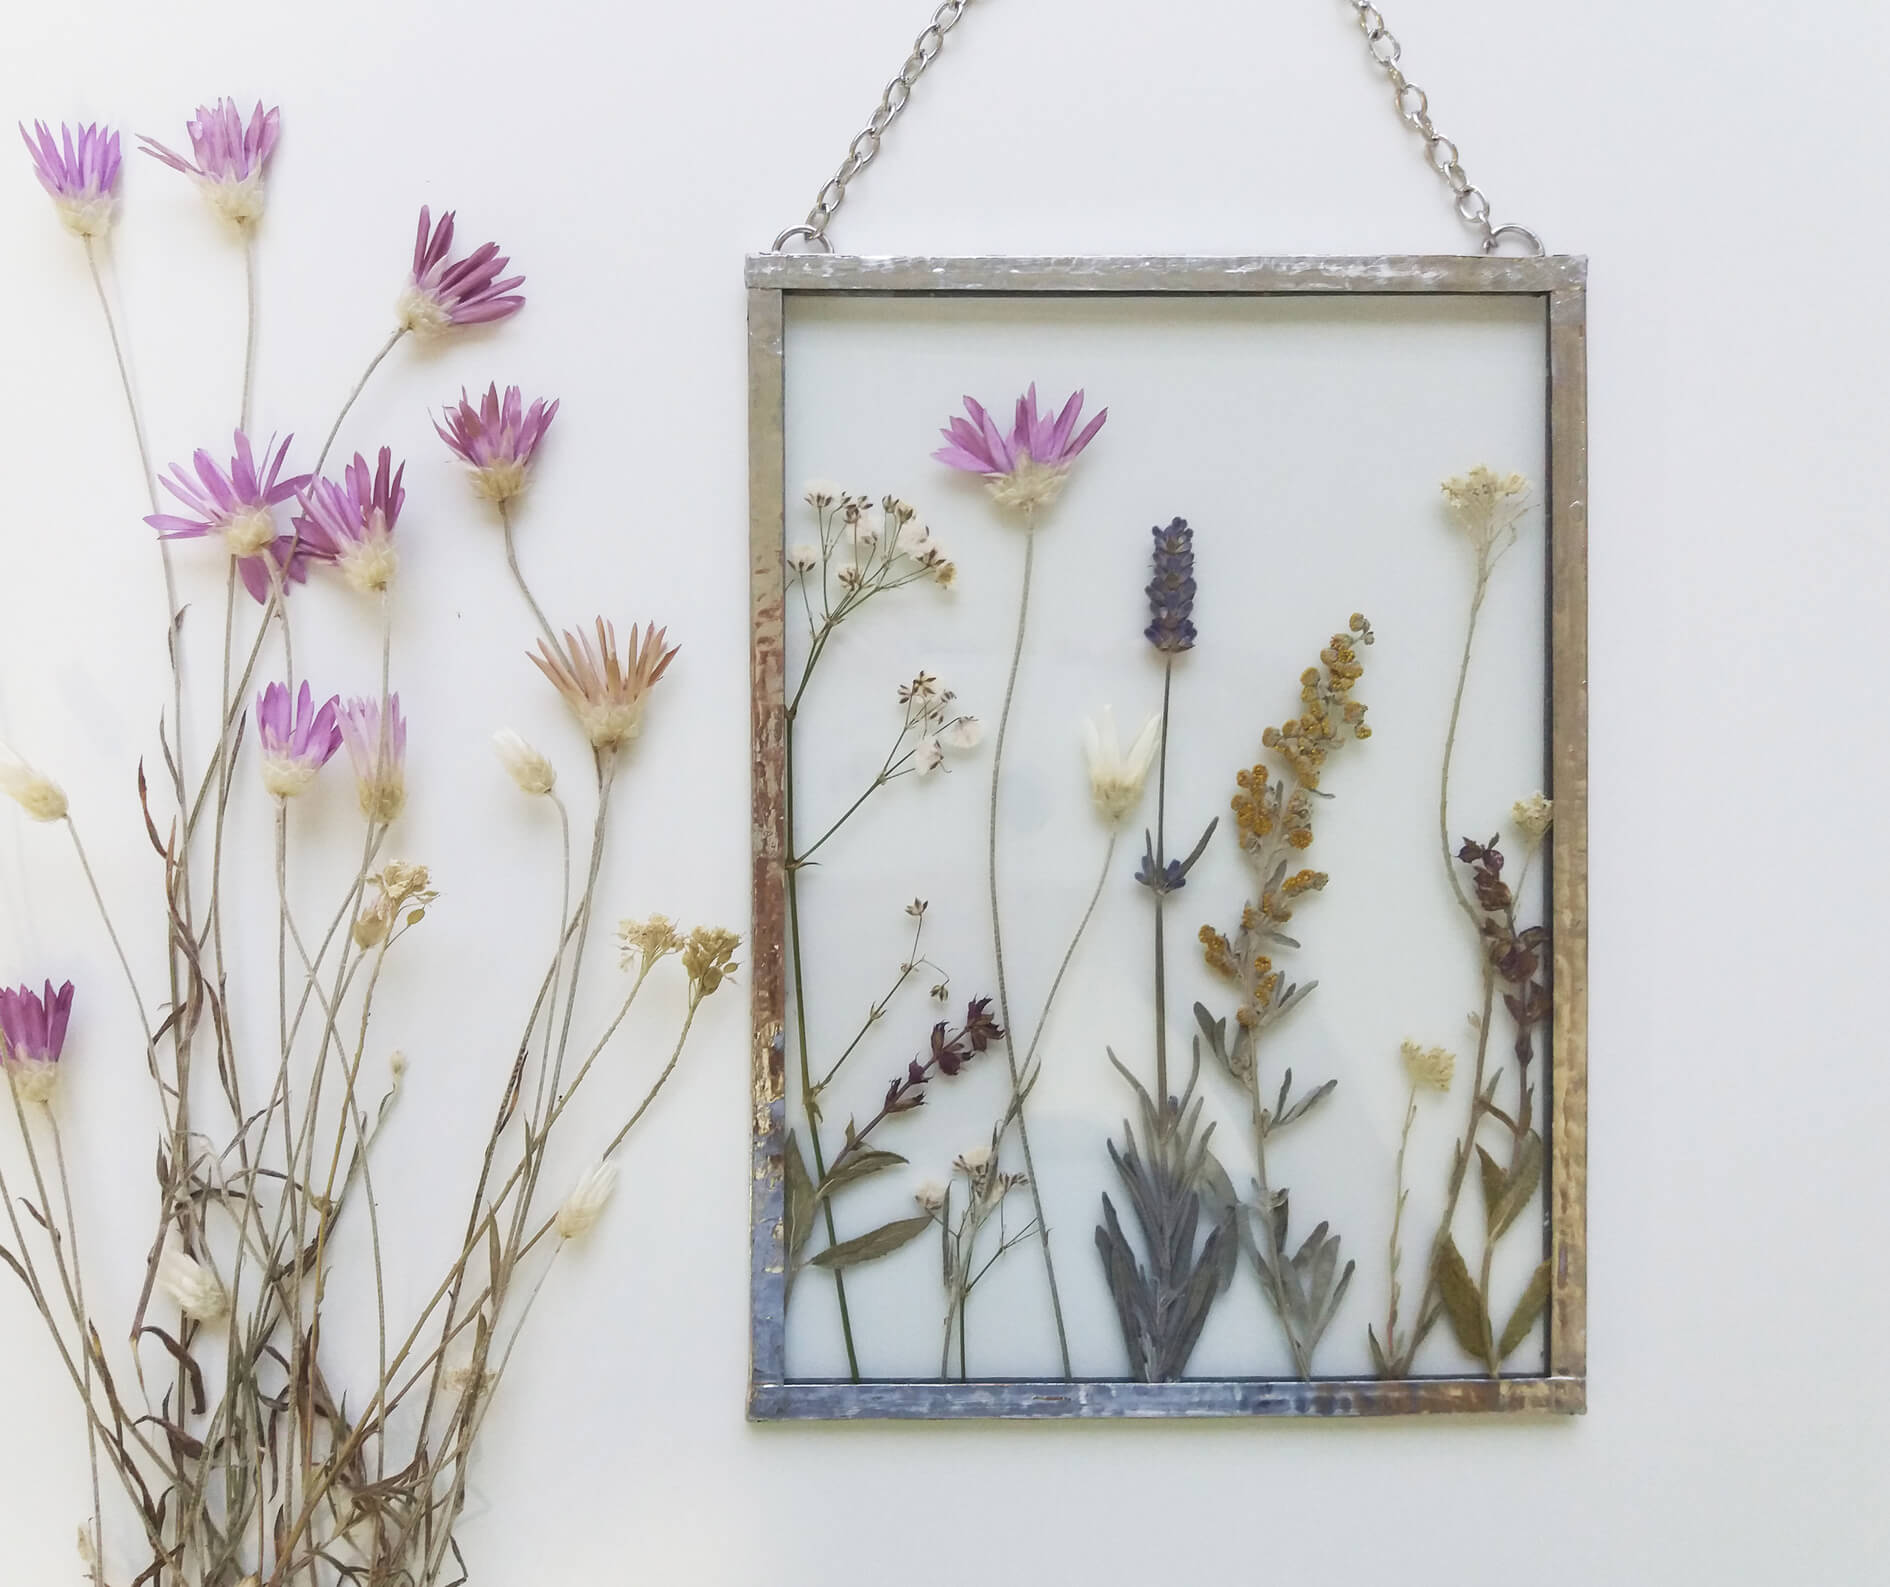
Transforming your dried blooms into framed art is a beautiful way to keep the memory of your wedding alive. Follow these steps to create a beautiful bridal bouquet keepsake:
- Choose Your Frame: Opt for a shadow box for depth or a sleek picture frame for a modern, pressed look. The right frame can turn your design into a statement piece that matches your décor.
- Arrange Your Flowers: Lay out your design, mixing colors and sizes to create a visual that captures the eye.
- Add in Story Elements: Incorporate small, meaningful items from your ceremony – like a snippet of your dress lace or a copy of your vows in the background. These elements add a personal narrative to your display.
- Preservation Tips: A light mist of UV-resistant spray can help protect the colors from fading. Additionally, positioning your framed art away from direct sunlight and humidity will also preserve its beauty for years to come.
2. Resin Keepsakes
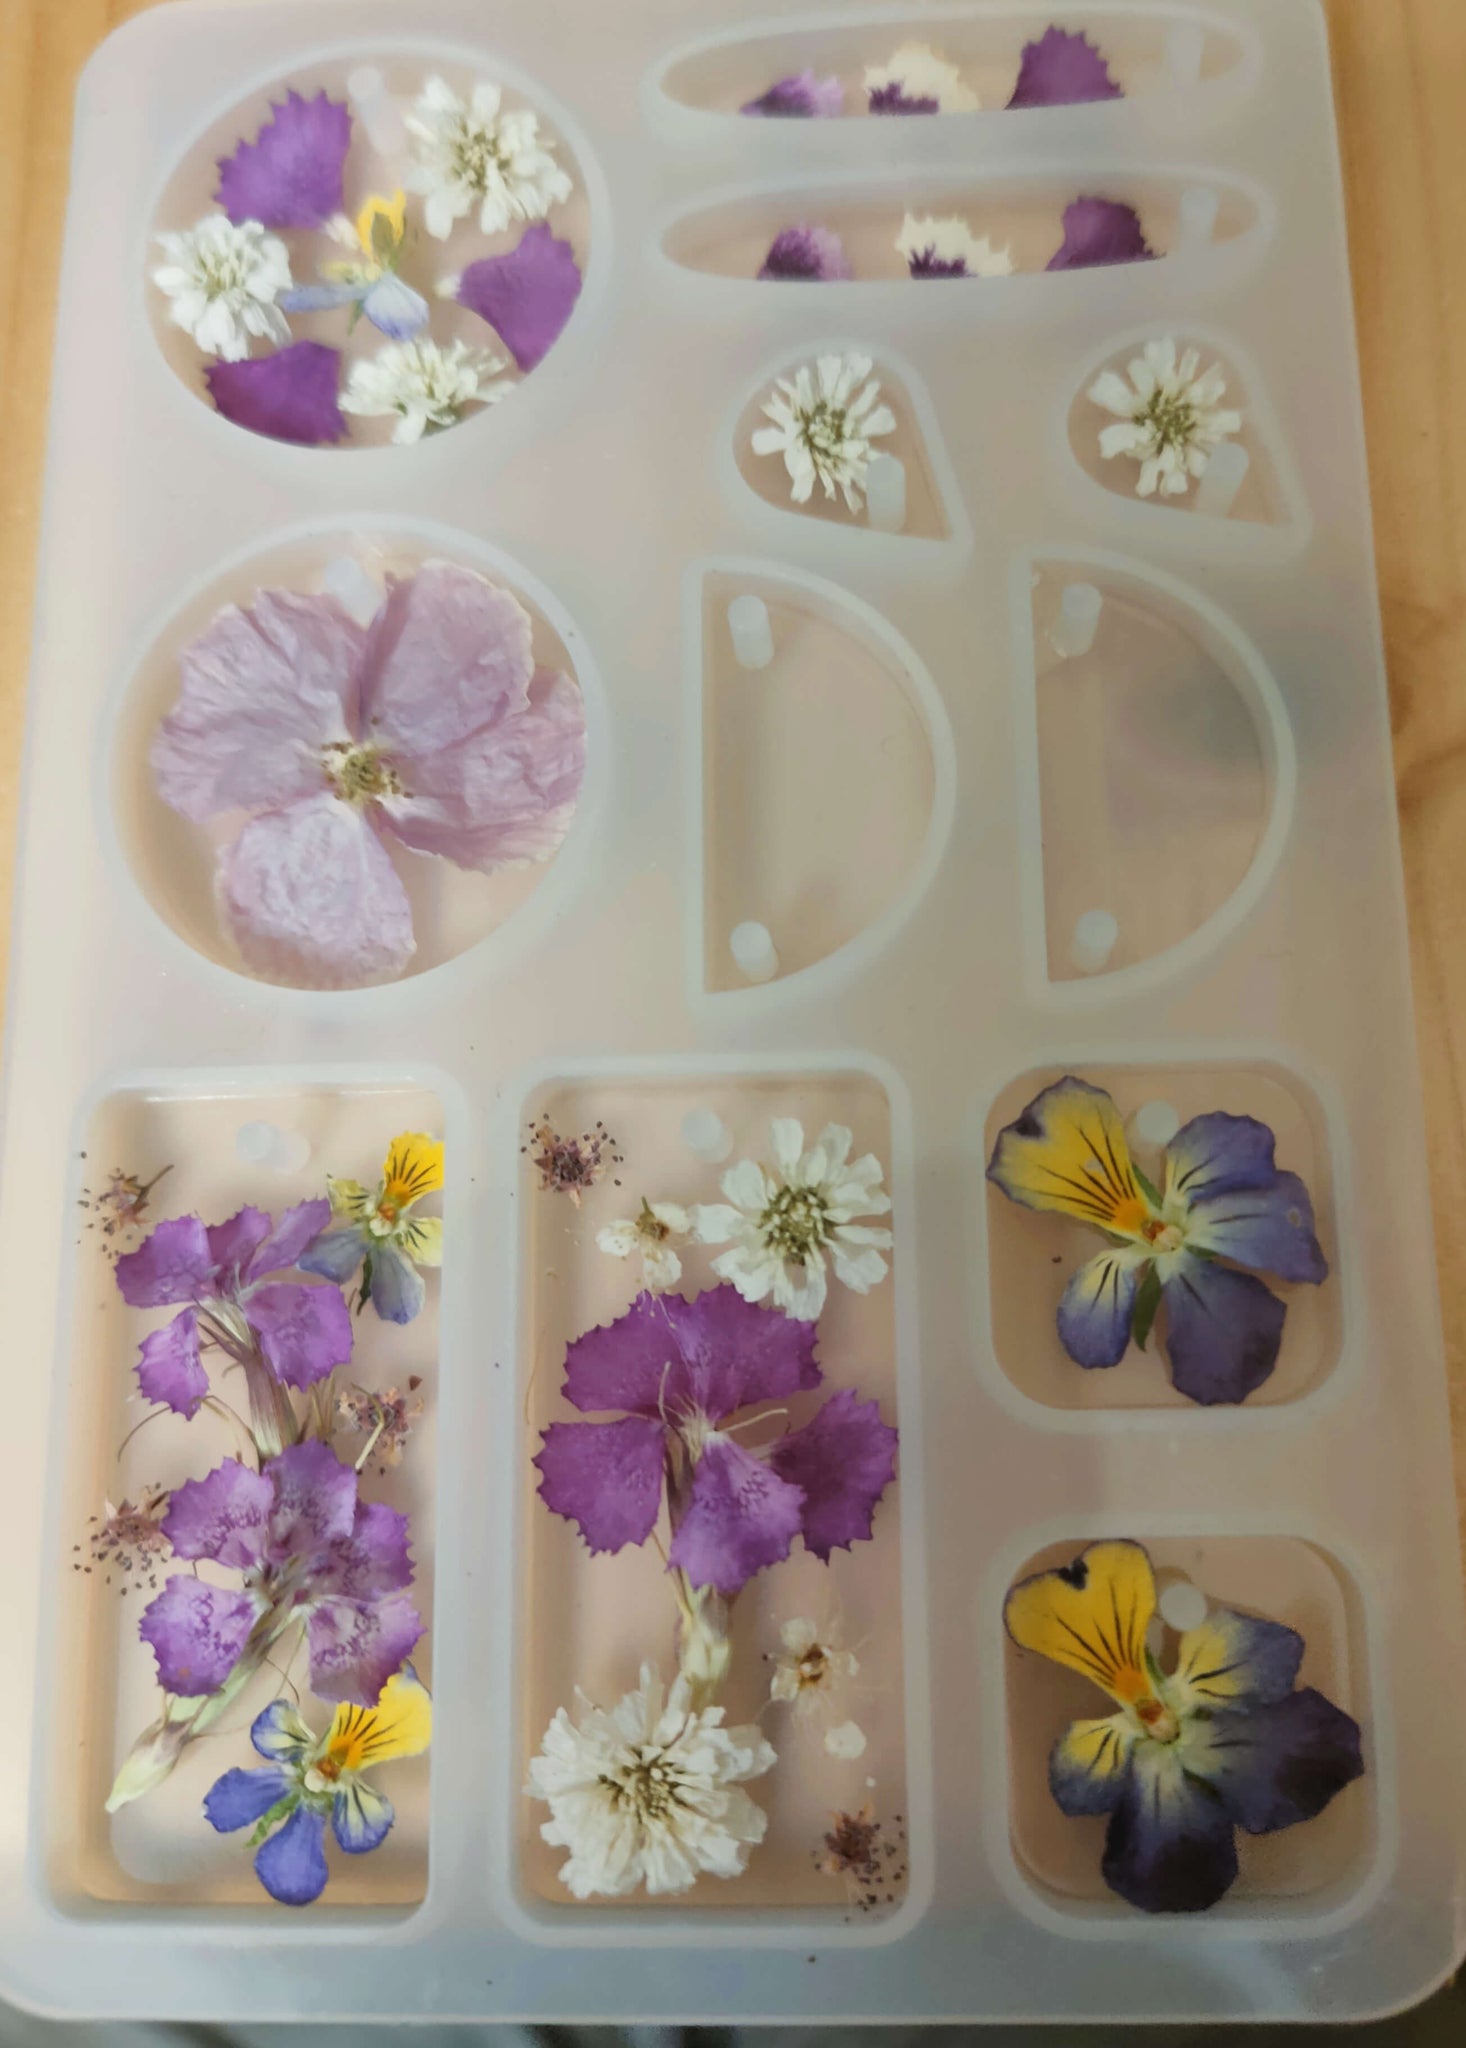
Making household items out of your floral arrangements, such as coasters, bowls, paperweights and jewelry, is a modern and stunning way to preserve the beauty of your special day. Create your resin mementos by following these steps:
- Preparation: In order to prevent any decay inside the resin, check that your blooms are thoroughly dried. Then, start to play around with the design, considering which parts of the flowers you'd like to showcase, such as petals, buds or the full flower.
- Choose Your Mold: Resin molds come in various shapes and sizes, from simple pendants to large decorative pieces. Select a mold that complements the size and shape of your design.
- Mix in the Resin: Follow the instructions on your resin kit carefully. Remember, the key to a clear and bubble-free design is properly mixing the resin and hardener.
- Arrange Your Flowers: Place your design into the mold before pouring the resin. You can arrange them in layers for a 3D effect, ensuring each layer is fully cured before adding the next.
- Pour the Resin: Carefully pour the mixed resin over your flowers, ensuring they’re completely covered. Use a toothpick to remove any air bubbles and adjust the placement of the flowers as needed.
- Cure the Resin: Allow the resin to cure fully, which could take anywhere from 24 hours to several days.
- Finishing Touches: Once ready, you can sand any rough edges or simply polish the piece to a shine. For jewelry, attach any necessary hardware, like chains for pendants or hooks for earrings.
3. Decorative Wreaths
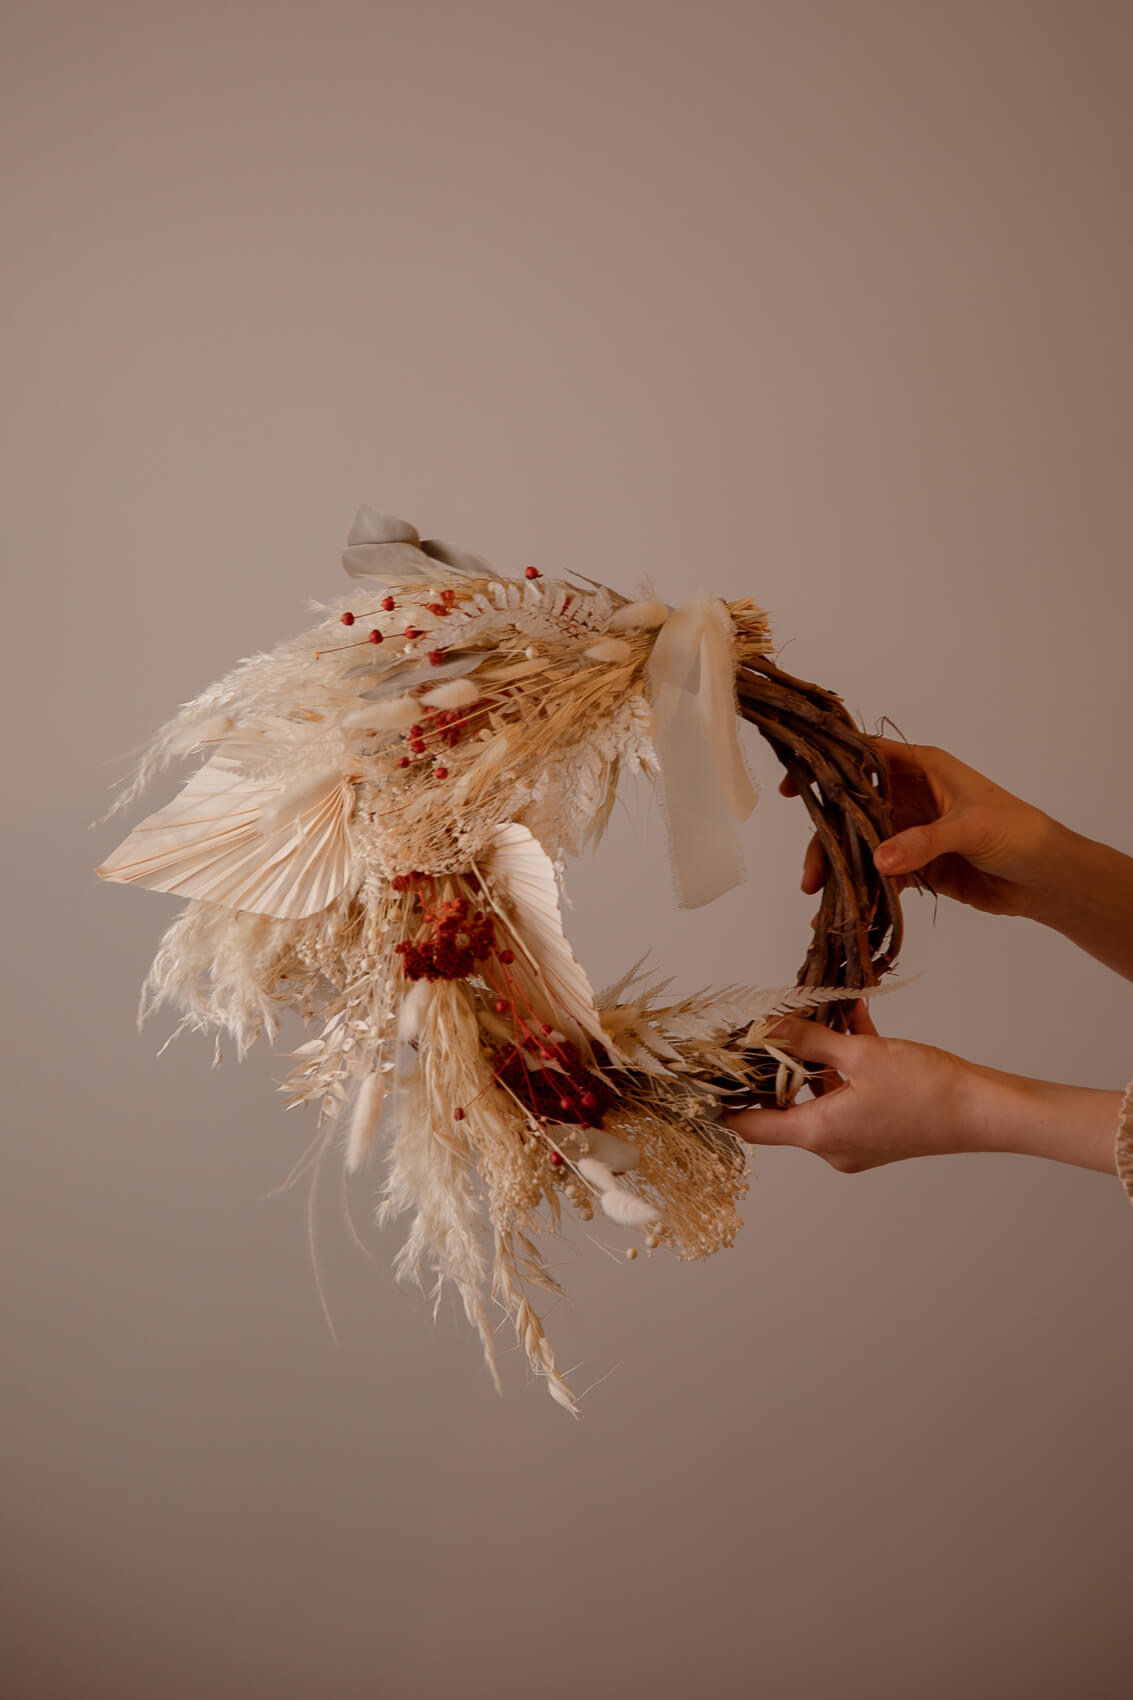
A wreath can be displayed either on your front door to greet visitors or inside your home to add a touch of seasonal charm or decorative flair. Here’s how to make a dried flower wreath that will keep your wedding day alive all year round:
- Gather Your Materials: You'll need a wreath base, which can be made of grapevine, wire, or foam, depending on the look you’re going for. Collect your dried blooms, along with any additional greenery, ribbons, or decorative elements you want to include.
- Plan Your Design: Before attaching anything, lay out your design around the wreath base. A great idea to capture the essence of your special day is to integrate your wedding colors or themes into the design.
- Attach Your Flowers: Start attaching your flowers to the base. If you’re using a grapevine wreath, you might be able to tuck the stems directly into the wreath. For wire or foam bases, use floral wire or hot glue to secure them in place. Work your way around the wreath, adding blooms and greenery until you’re satisfied with the fullness and look.
- Add Personal Touches: Incorporate other elements from your wedding ceremony, such as ribbons or even small mementos, to make your design uniquely yours. These personal touches can transform your wreath into a narrative of your love story.
- Display Your Wreath: Choose a special place in your home to hang your creation. It could be a focal point in your living room, above the mantel, or on your front door as a welcome sign of your journey together.
4. Candle Embeds
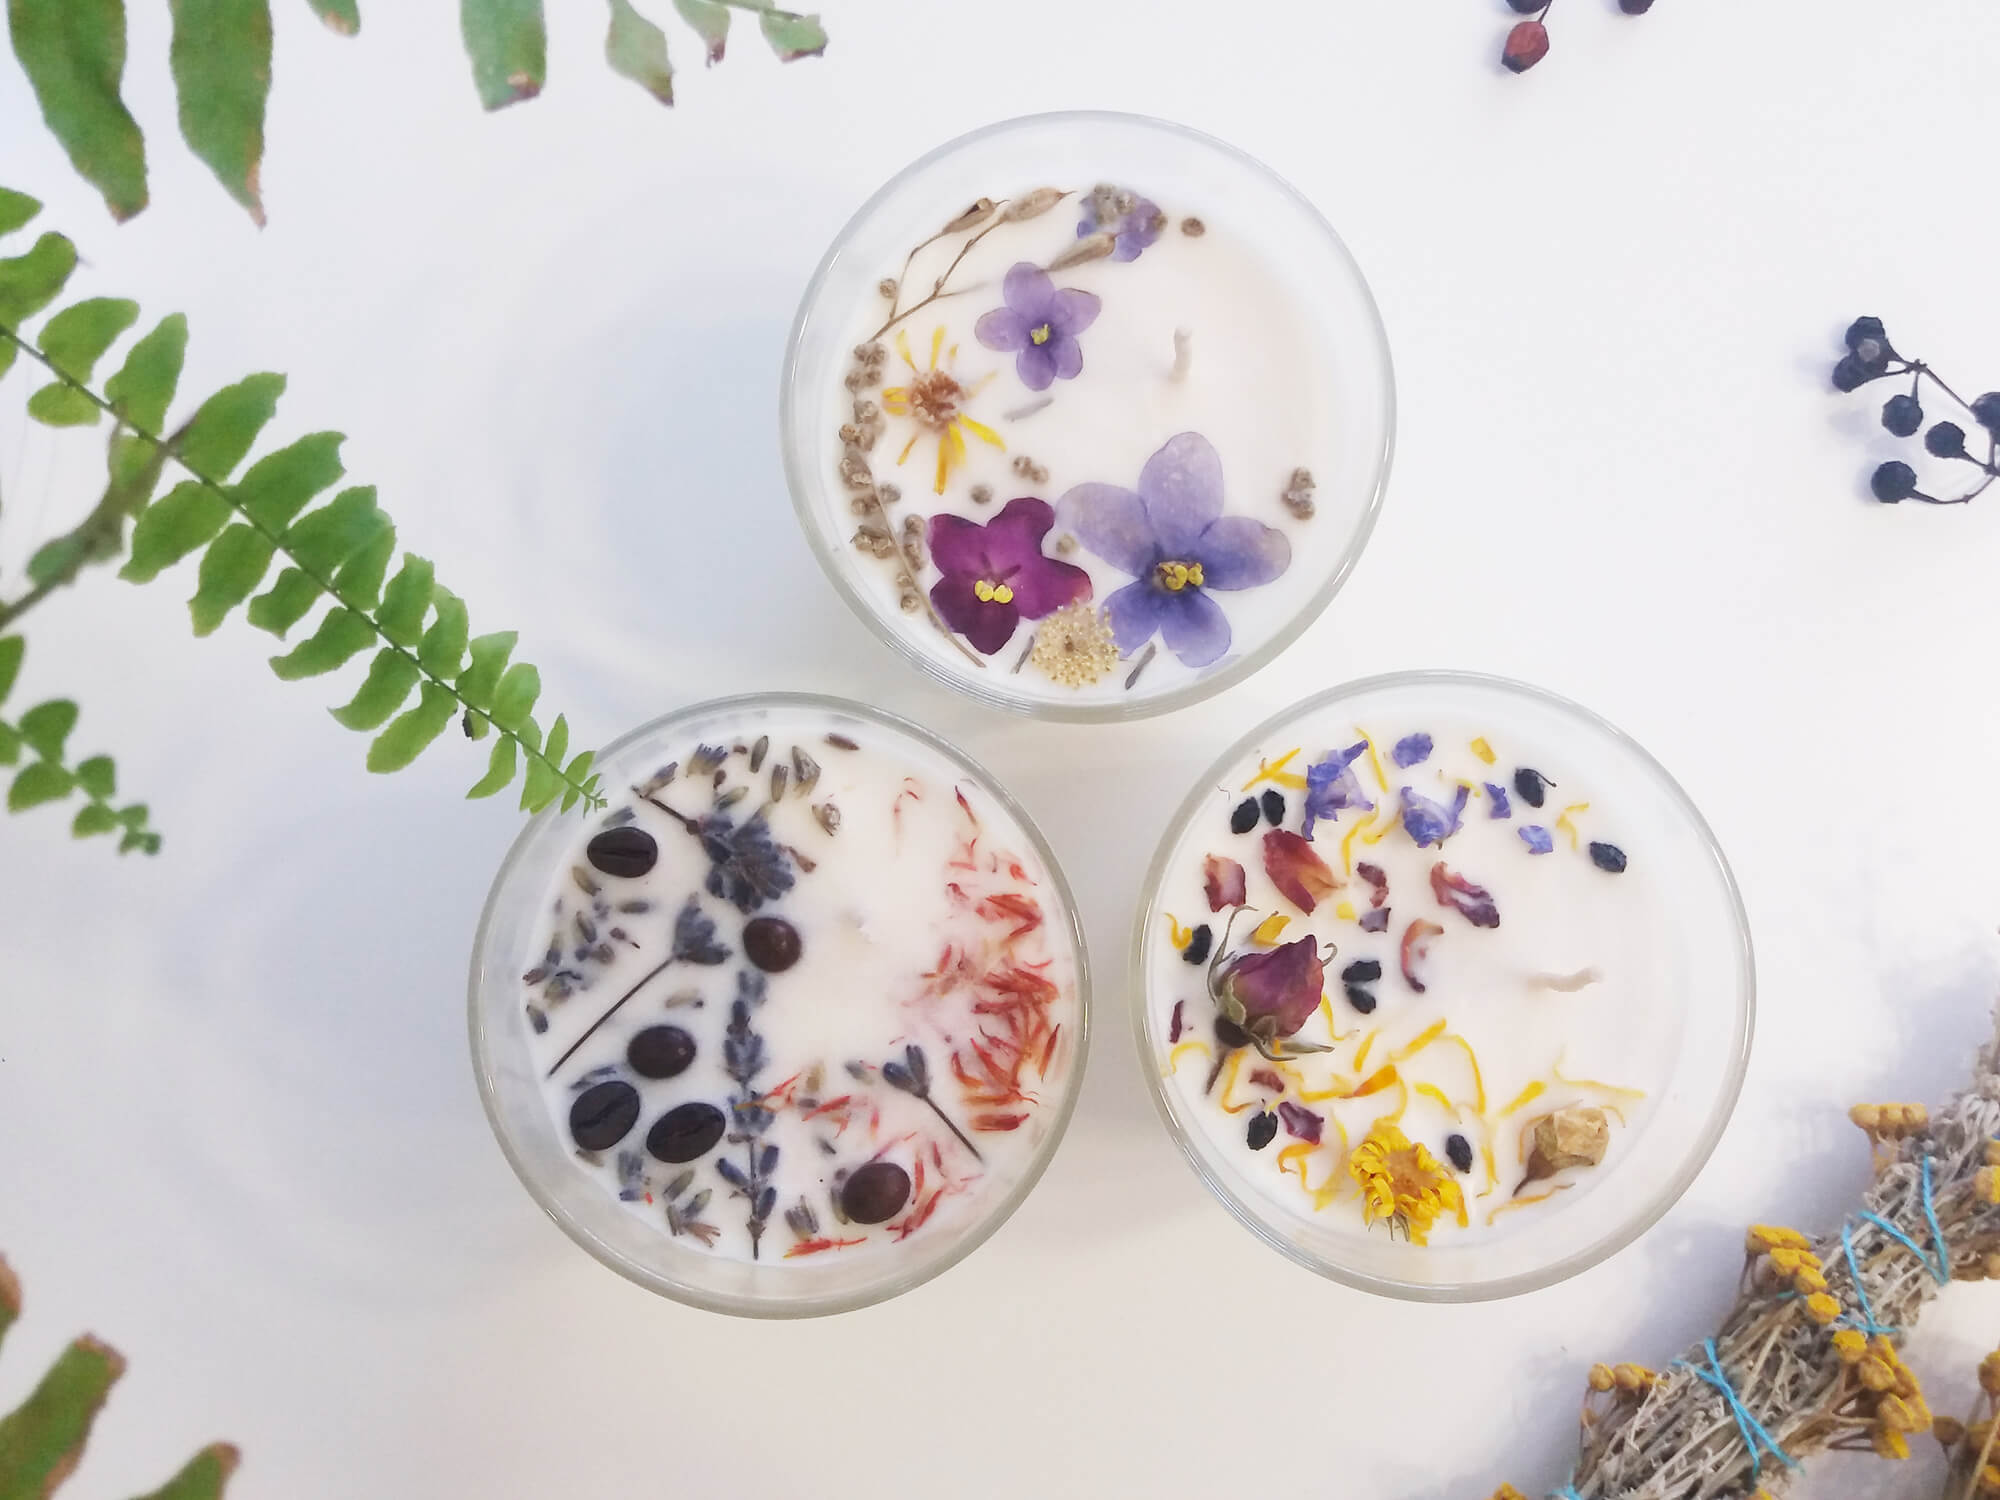
Reinvent your wedding flowers – beyond the vase and into the wax. Interested? Follow the steps given below to embed dried petals into candles:
- Choose Your Candles: Select clear, gel candles for a see-through effect or go with traditional wax candles if you prefer a more solid look. Pillar candles are great for embedding larger arrangements, while smaller votives are perfect for individual petals or smaller blooms.
- Prepare Your Flowers: Ensure your floral arrangements are completely dried, and choose pieces that will fit well on the surface of your candle. If embedded within the candle, smaller pieces work best to maintain the integrity of the wax’s structure.
- Arrange Your Design: If you’re decorating the outside of the candle, arrange your blooms directly on the surface, planning out how they’ll look once secured. For gel candles, decide the placement of each petal inside the container before pouring the gel.
- Secure the Flowers: For outside decorations, use a heat gun to gently melt the surface of the wax and press your design into place. For gel candles, carefully place your flowers in the container, using tweezers for precise placement, before adding the melted gel.
- Pour and Set: For embedding within wax candles, consider layering flowers between pours of wax for a tiered effect. On the other hand, for gel candles, carefully pour the melted gel into the container, ensuring that it does not disturb your bloom placements. Allow it to cool and set completely.
- Final Touches: Once your candles are set, you may choose to wrap them with a decorative ribbon or place them in a holder that complements your theme.
5. Holiday Ornaments
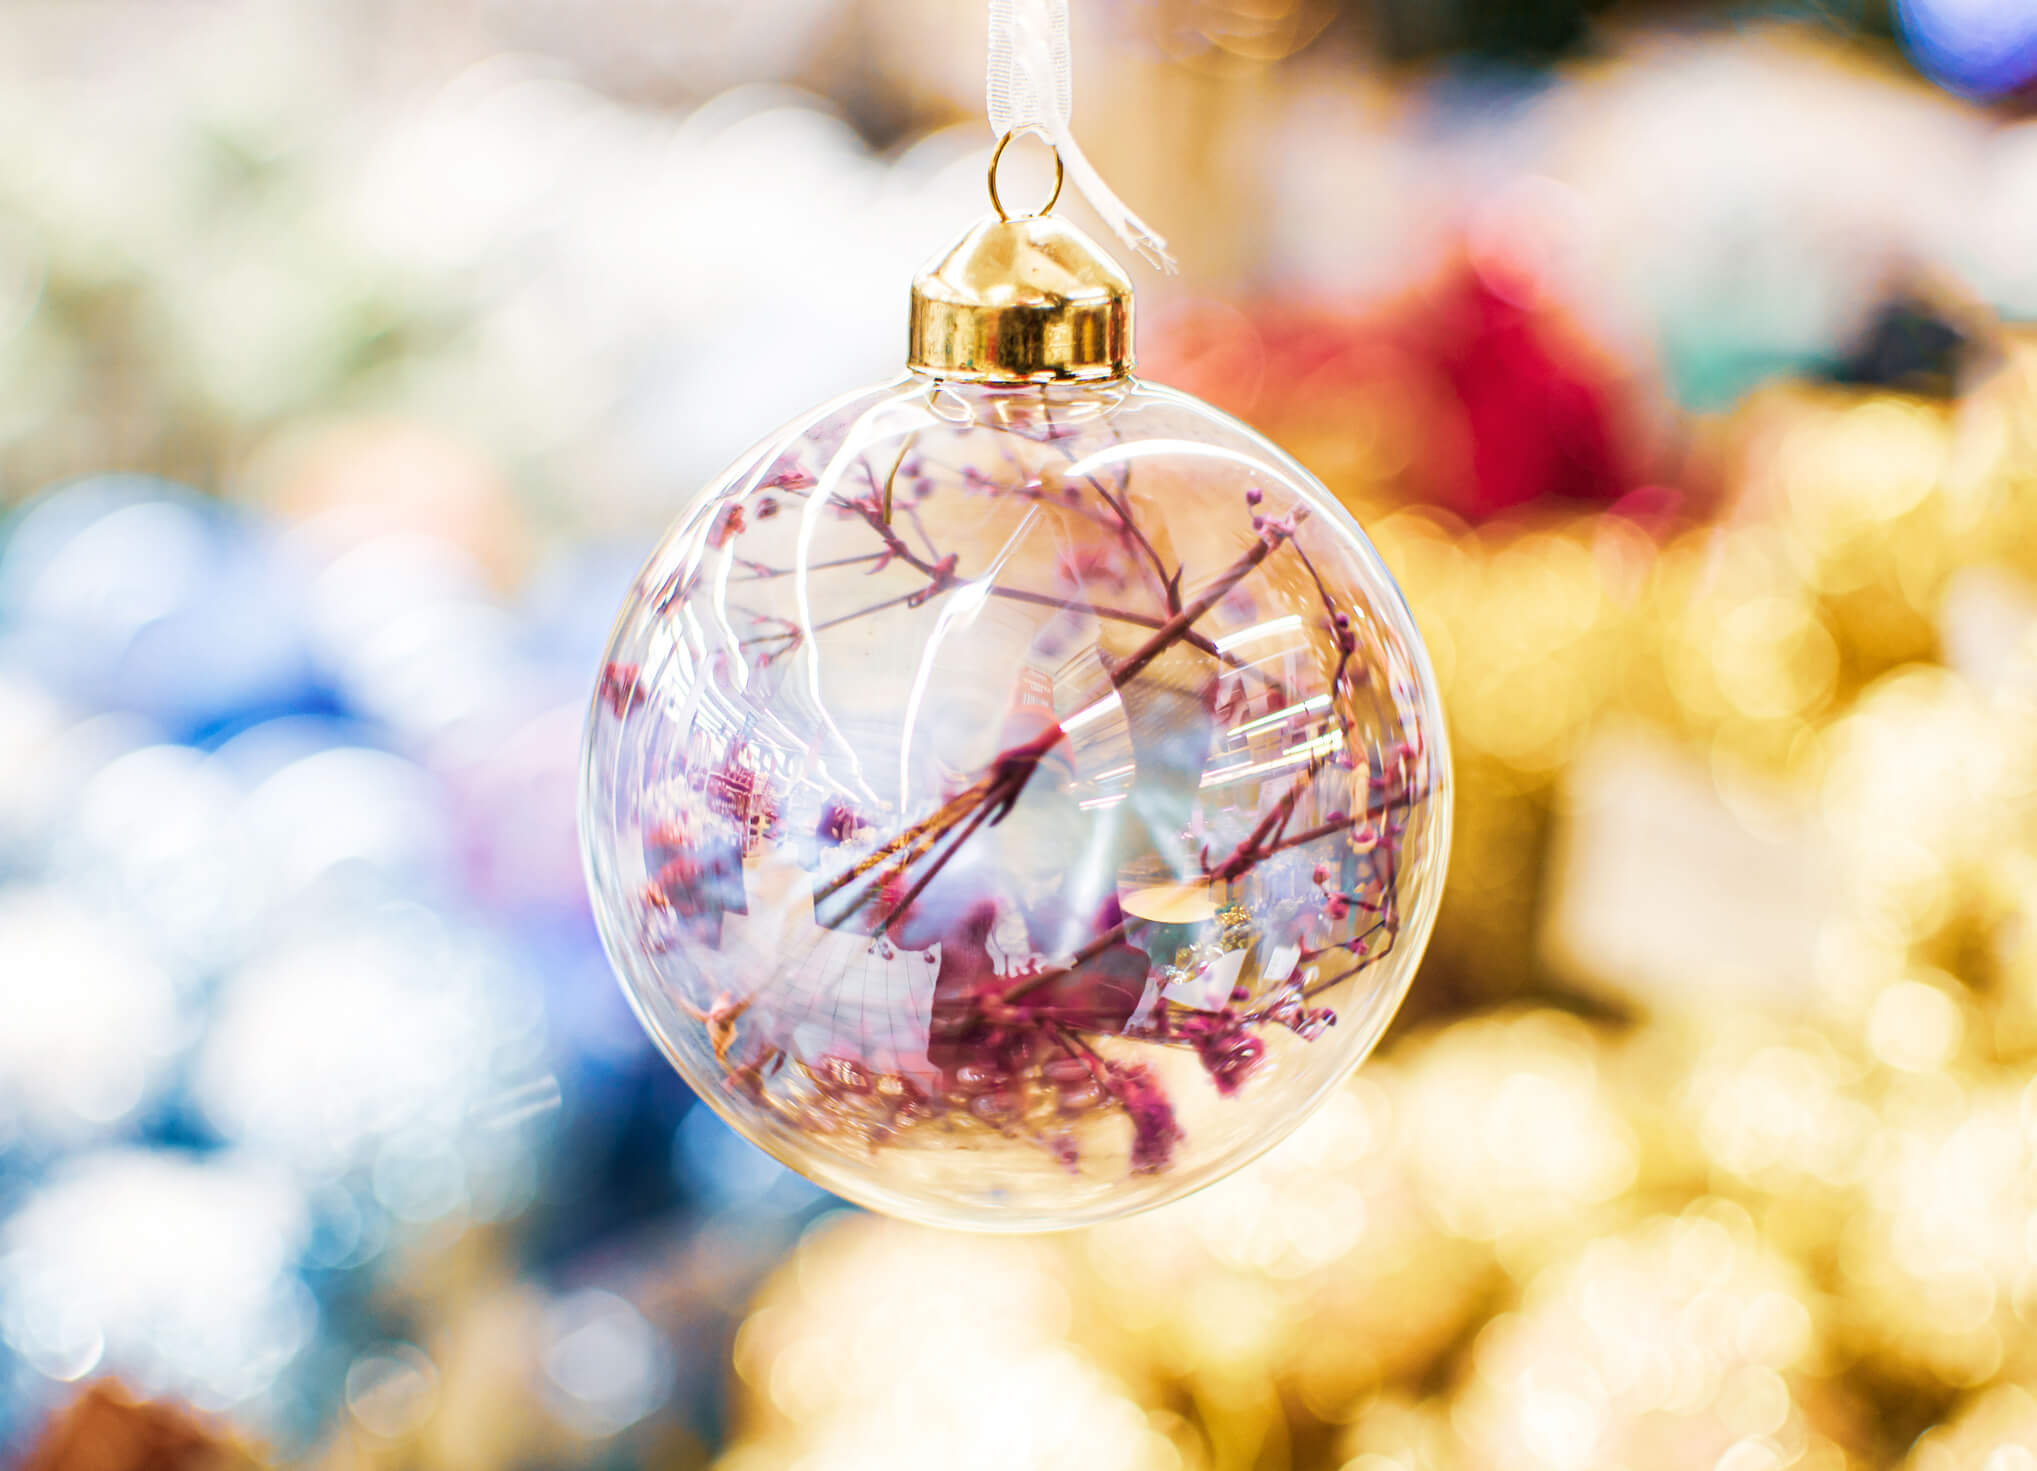
By incorporating elements of your wedding flowers into ornaments, you can create beautiful decorations that evoke cherished memories while also adding a touch of seasonal cheer to your home. Let’s take a look at how to do it:
- Select Transparent Ornaments: Use clear glass or plastic ornaments as your base, so you can see the decor inside.
- Pick Your Flowers: Choose smaller blooms or individual petals, taking into account how their colors and shapes will look inside the ornament.
- Fill Your Ornaments: Carefully place your chosen florals into the ornaments. A pair of tweezers can help with precise placement. It’s not just about filling the space but creating a miniature display that captures the eye.
- Add a Personal Touch: For a little extra sparkle, consider adding a bit of glitter or a small ribbon that matches your wedding colors or holiday decor.
- Close and Display: Once you’re happy with the arrangement, seal the ornament. Attach a decorative ribbon or string to the top for hanging.
- Decorate and Enjoy: Hang your new ornaments on your Christmas tree, in a window, or anywhere they can catch the light and remind you of your love. They make great conversation starters and can even be thoughtful gifts for family and friends.
6. Bookmark Keepsakes
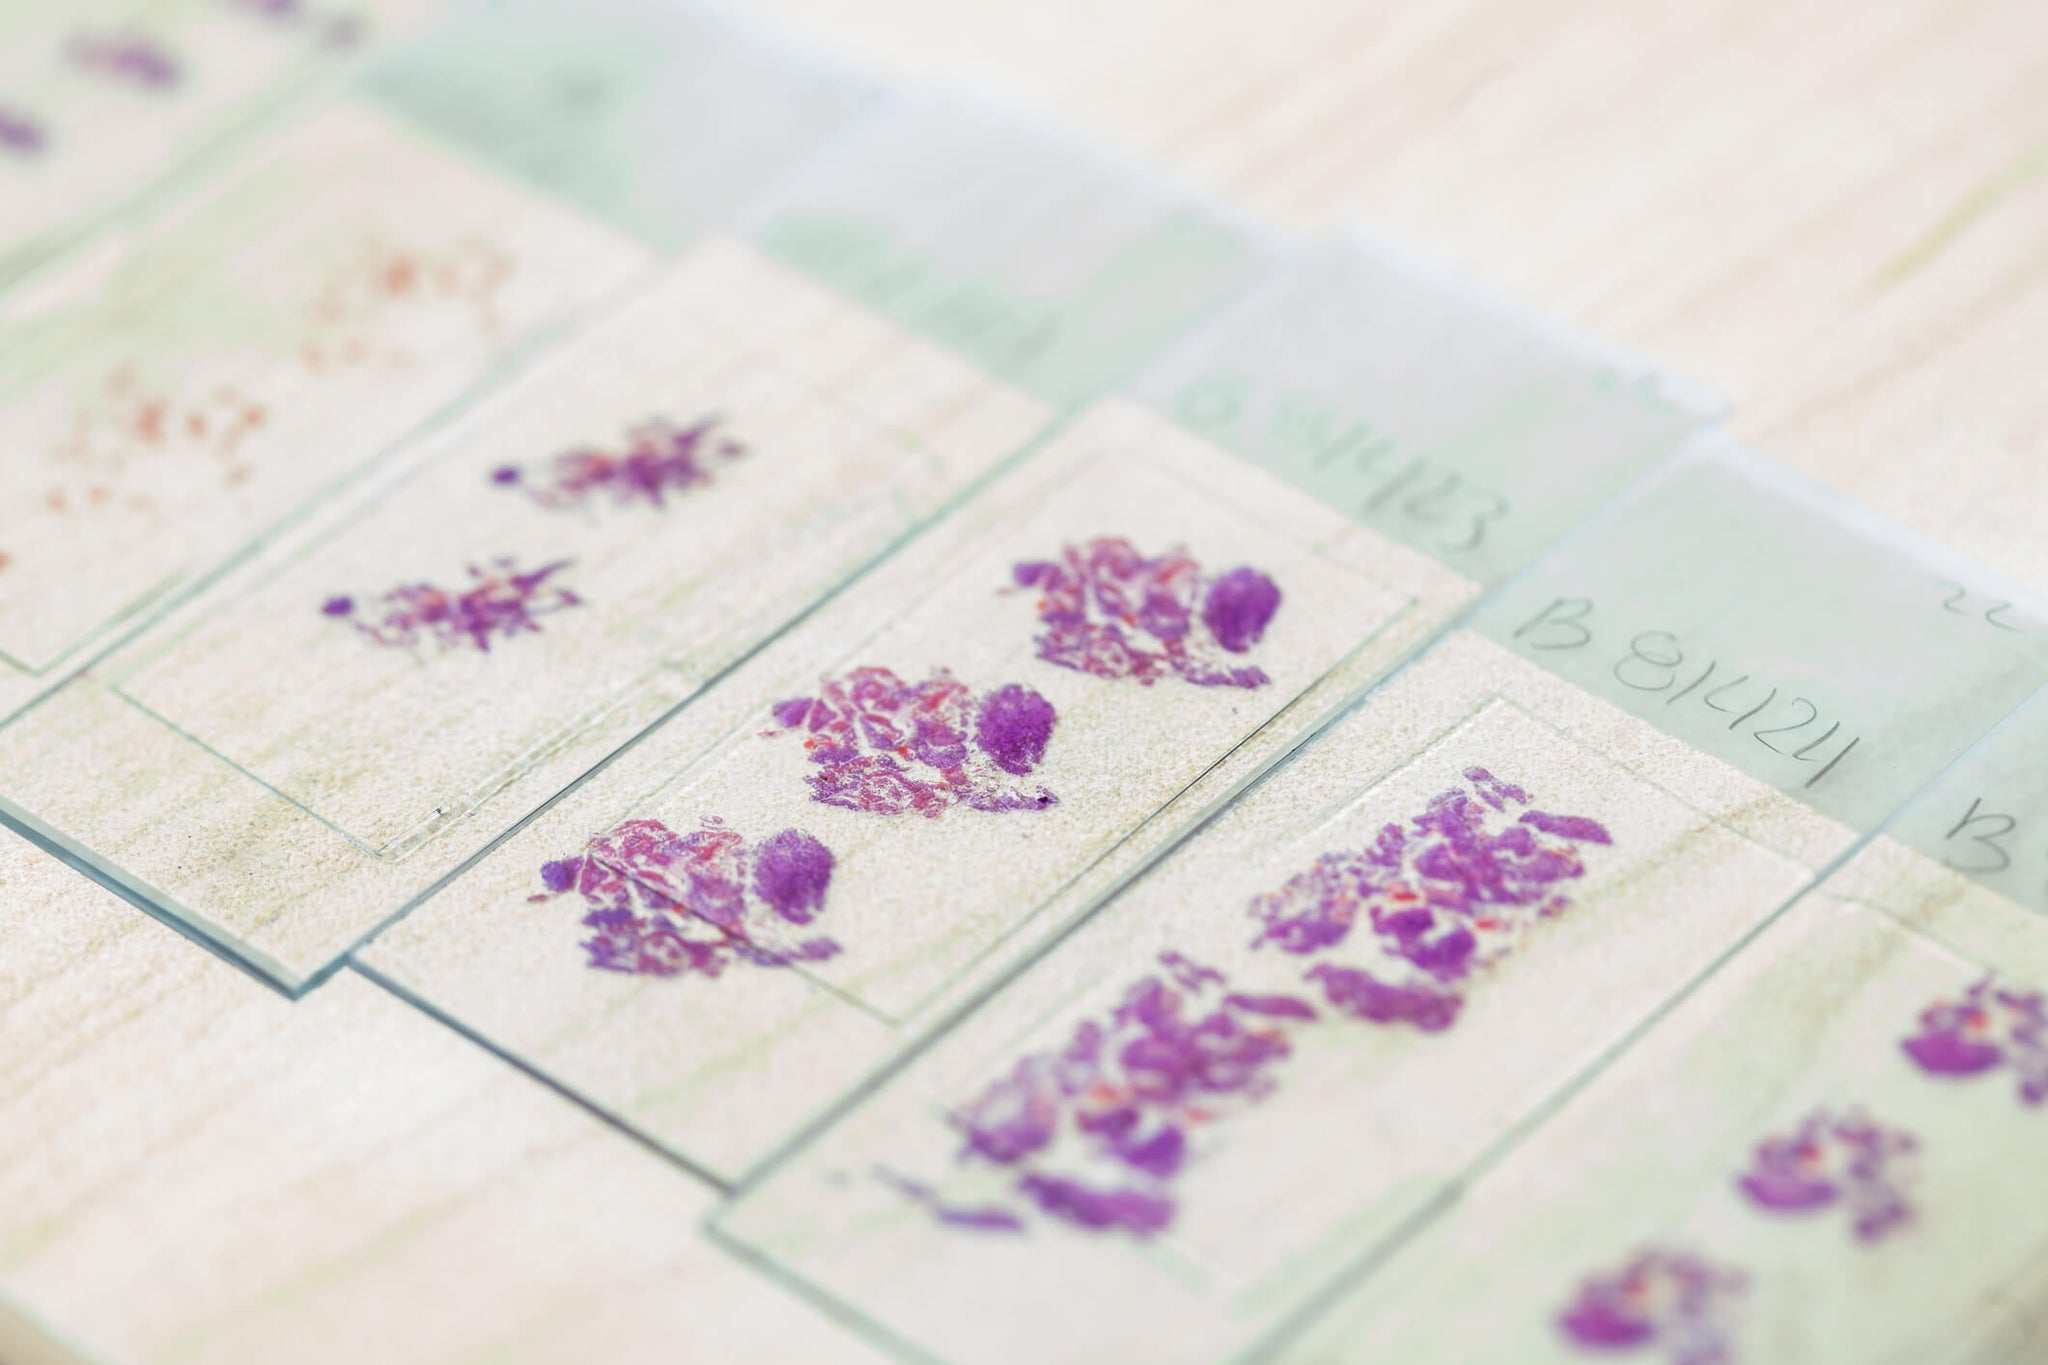
Perfect for the book-loving couple, these bookmarks can keep your wedding close with every page you turn. Here’s how to craft this thoughtful treasure:
- Select Your Flowers: Again, for this wedding flower keepsake, choose smaller blooms or individual petals from your bouquet that have been dried. These will fit better within the confines of a bookmark.
- Design Your Layout: Arrange your design on a strip of cardstock or heavy paper cut to your desired bookmark size. This is your chance to get creative with patterns or a minimalist design.
- Laminate for Longevity: Once you’re happy with your arrangement, carefully place your design into a laminating pouch, as this will protect your bookmark and keep everything in place. If you don’t have a laminator, clear adhesive paper or a professional laminating service are great alternatives.
- Personalize: Before laminating, you might also add other elements like a snippet of your invitation, date, or name to make it even more personal.
- Trim and Finish: After laminating, trim any excess, leaving a small border around the edges to ensure it stays sealed. Punch a hole at the top to add a tassel or ribbon if desired, perhaps using a piece from your decor or attire for an extra special touch.
Bring Your Wedding Memories to Life With Hidden Botanics
At Hidden Botanics, we understand that your wedding day is filled with moments meant to last a lifetime. That's why we specialize in providing dried flowers that can easily transform into cherished keepsakes. Hence, from the moment they grace your venue to the years they spend adorning your home, our premium artificial and dried wedding flowers are a constant reminder of the joy and commitment shared on your special day.
But that’s not all; at Hidden Botanics, we pride ourselves on our bespoke service. Our team is dedicated to helping you select the perfect wedding flowers to match your personal style. We're here to ensure that every petal and leaf adds to your most cherished moments, making your special day truly unforgettable.
Explore our lookbook and let Hidden Botanics help you turn your wedding flowers into lasting symbols of love and beauty. With our dried blooms, your memories will blossom for years to come.
Final Thoughts
Cherish the essence of your special day with dried wedding flowers keepsake. Simply, transform your blooms into beautiful, lasting memories that decorate your home and heart. Our creative preservation ideas ensure your love story continues to blossom. So dive in, get creative and capture the magic of your wedding in a treasure for your home.
Frequently Asked Questions
Can you preserve your own wedding flowers?
Yes, you can preserve your own wedding flowers using methods like air drying, pressing, or using silica gel. Each technique requires patience and care but can be a rewarding DIY project that turns your blooms into lasting keepsakes.
Is it worth it to preserve your wedding bouquet?
Absolutely. Preserving your wedding bouquet allows you to capture a tangible piece of your special day, transforming it into a cherished keepsake or a piece of decorative art that can bring joy for years to come.
How long do preserved wedding flowers last?
With proper preservation and care, dried wedding flowers, like those from Hidden Botanics, can last for many years. Importantly, the longevity of your preserved blooms depends on the method used and how they are displayed or stored, with some techniques keeping them beautiful for decades.


